
Heroic Intervention is probably the most under utilized special rule in the whole game, and I am here to point out some of the really great ways to use it, and how to ruin your opponent's day with it. Bear in mind, there are not a ton of uses for it, so this will not be a particularly long post. Pay particular attention if you have a character or an ability that allows you to HI from more than 3" and adjust the comments below accordingly.

We all know the basic way of using it, putting the character near a unit that is about to get charged, then stepping in after the charges were made so he can make attacks in the combat but not get attacked in return, or if your character is particularly dangerous in combat, perhaps you will make your opponent think twice about charging at all. This is a little more difficult that you might think, if you leave enough of a space for your character to HI in-between your models, then it is likely that the enemy unit will be able to reach your character with their charge move. This will allows them to place attacks on your character, likely before he gets to attack too. You can so some tactical spacing to ensure that your opponent's charging models can't make it within 1" of your character, but so that you can HI to within 1" of the charging models.
 |
| Your 3" range must reach far enough past the screen |
 |
| Keep spacing so than he can't get within 1" but you can HI to within 1" of him |
The very first trick I am going to tell you about HI is that it does not have to be performed against units that have charged that turn. This comes up in a game more often than you might think and there are 2 instances that I can think of that happen fairly regularly.
First is against that suicide squad who have used some fast movement, possible a double move and/or advancing, and assault weapons to pull off an in your face round of shooting hoping to pick off a character. I've done it a couple times with Slaaneshi Chaos Bikers with Meltaguns, and Warp Time, they are able to move 40"(if they advance) across the table and shoot twice. Your opponent has to make sure to get the shooters close enough to the character so that other units in the army don't prevent you from targeting the character, so they will usually have to be pretty close.

Should your character survive, and they either can't or decide not to assault you, you now have the chance to step in and punch them in the face.
The second "no charge charge phase" maneuver is against the "fence" move. You know, when your opponent moves some cheap ass unit right in your character's face in hopes of pinning him down and preventing him from moving. This only works against units that don't have fly, but I've done it a couple times against dudes on bikes. This also happens if your opponent falls back with a unit in hopes of keeping it alive, while still using it to block your character. If that unit happens to land within 3" of your character, you can step back in and smack em around.

The cultists above have stepped back out of combat so they don't die, but have to stay close enough together so that the Biker just doesn't drive away around them or through their bases. This forces them to remain within 3" of him so he will be able to Heroically intervene and kill a number of them during the enemies turn. There are lots of time I see this done in a way so that's its just a couple models standing in front of an infantry character and they just stand their until their turn.
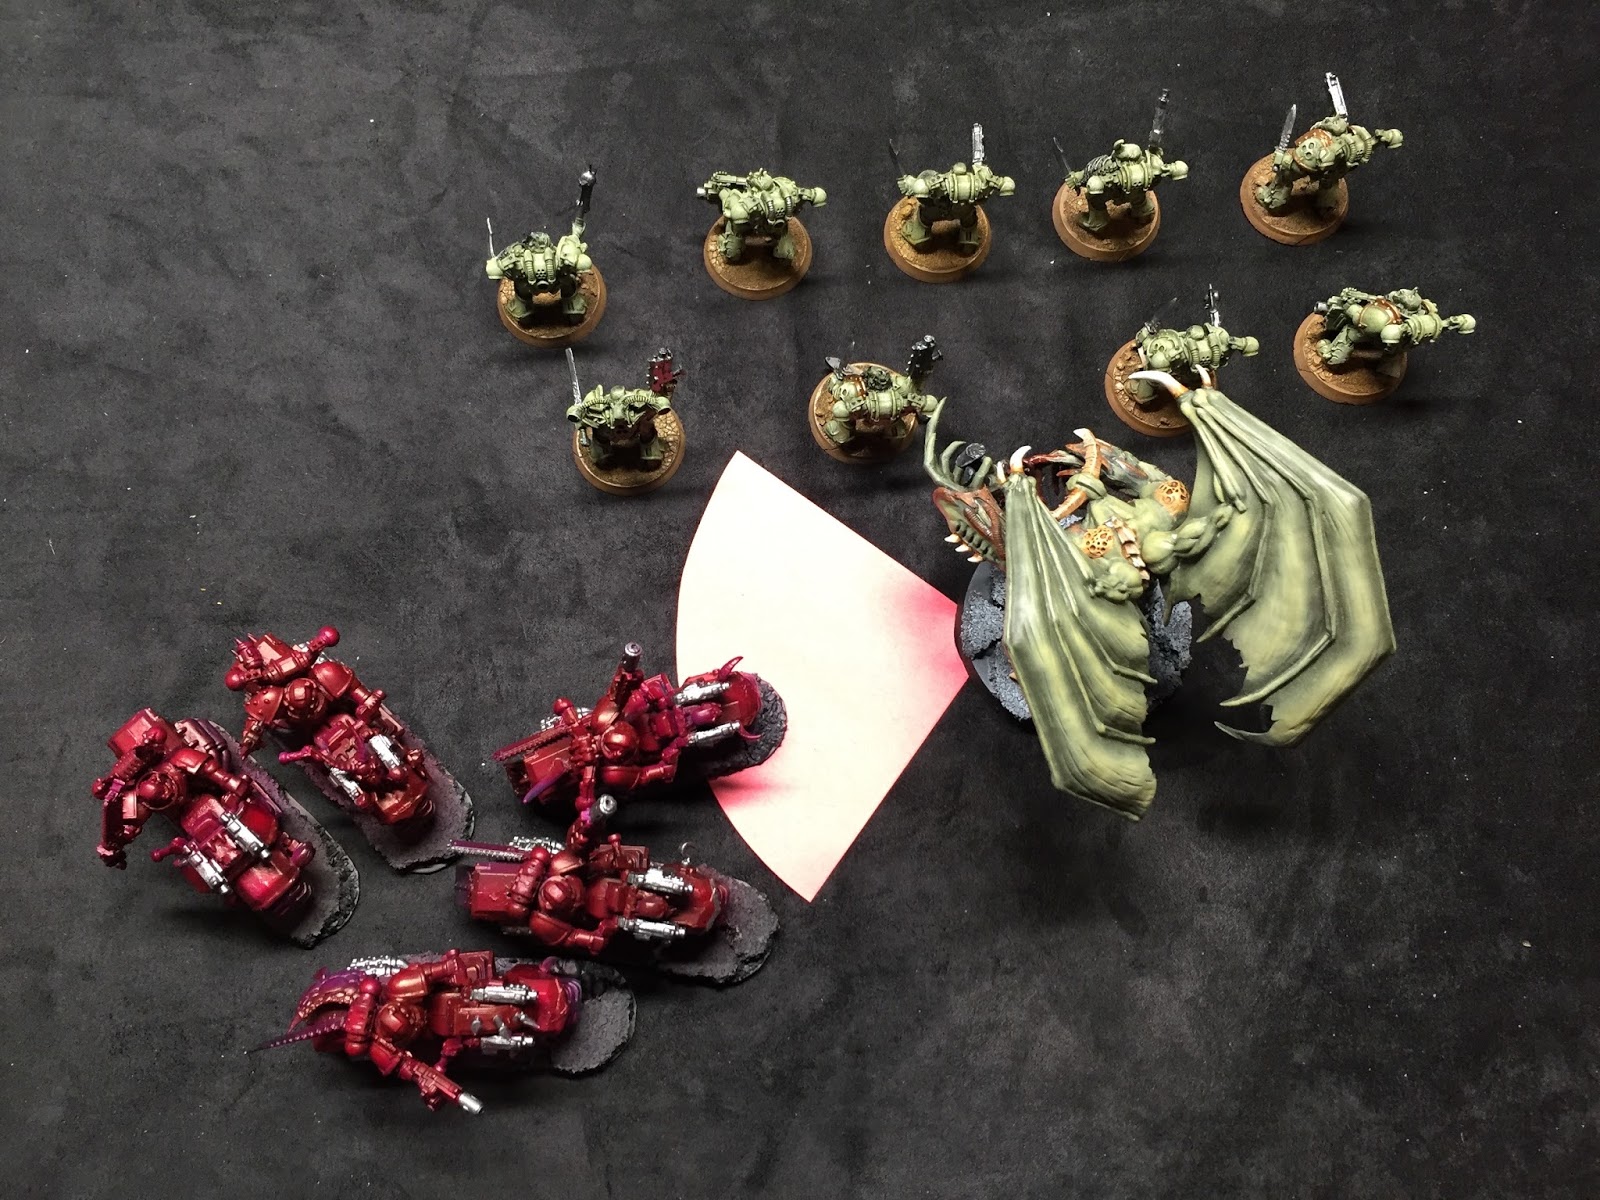
The last trick I've got, is more of a defensive maneuver that can help direct your opponent's pile in and consolidation moves. So, you have this unit that's pumping out tons of damage, Hive Guard, Obliterators, Pask in a Punisher Leman Russ, something with tons of shots and is dangerous with the overwatch as well.

You've got your bubble wrap set up but your opponent has shot them up a bit and is looking to make a big assault move around your bubble wrap and to use his pile in and consolidation moves to tag this unit and prevent it from shooting. If your opponent is good and places his models just right, he can extend his reach quite a bit past the original target.

The placement of the enemies models is going to be important because at least one model will have to end it's charge closer to the tank than the cultists so that it can pile in to it. Once the charge is complete then you step in with your character making sure to make base to base contact with the lead model so that it cannot pile it. It states in the FAQ that if you are in base contact with a model you cannot make a pile in or consolidate move.

And there you have it, you have successfully prevented your opponent from preventing your unit from shooting.
So get out there and practice these tactics, let me know how they perform, and if you have any ideas for a tactics post feel free to let me know in the comments. Thanks for reading.
Until next time, keep them dice rollin
This tacics post has been brought to you by...
 |
| Spellcrow |

My buddy Donny has been painting models for years now, why not get him to paint some of yours? Is he good?!?! Well take a look at these miniatures he painted up that Spellcrow sent him...FOR FREE! There are links to each specific model in the caption.
 |
| Ork Doktor |


 |
| Werewolf |

Yeah, he's pretty good.